Hello! Long time no see!
So, I found this beautiful tutorial on toon shading in Maya yesterday How To Render Cell Shader and Outlines in Maya. Why am I doing toon shading? Because you never know when you might need it, so it’s always good to know how to make it work in Maya. For instance, you might be working on a game, and want to make some 3D elements, and render them in 2D, and use them as your sprite-sheets later.That was where I got this idea from originally, I started rendering out some cloud animation for a game I’ve been working on.
While this tutorial is amazing, I thought it would be good to some it up here, so that maybe people with limited Internet can just follow my instruction. Plus, after completing the tutorial,I ran into a couple of problems,my outline render looked either extremely ugly, or wouldn’t show up at all. This tutorial is quite simplified in case you’re new to Maya.
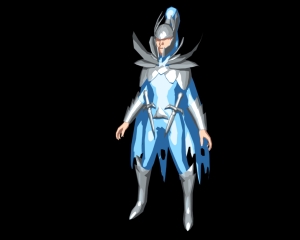
So, we will start with absolutely any scene,and any model. Whatever you feel like,I grabbed a Dota2 model
- Assign a toon shader to the objects you want to look cartoony. You can do that by going into your rendering tab (on the left there’s a markdown menu under your ‘File); from there go to Toon : Shaded Brightness Three Tone. Render it with Mental Ray, see what it looks like. To change your rendering system to MR,go into your render setting, it’s easily done from there. It’s the 4th icon here,and the first one is your rendering window,from there you can render you scene. For more info you can always go to the Autodesk website.
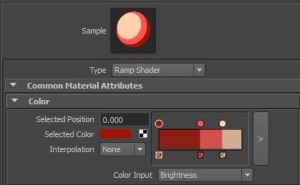
2. Play around with your light (you’ll notice that changing your light angle changes the way your object is shaded) and with the ramp of the toon shader. It’s easy.Go into your attribute editor for one of the objects with the shader created, and then to the Color section.
If you click on the circles at the top of the ramp, you can change the color of this particular part of the shader. So, in this case, we have the brightest part light pink, and the middle value is pink,and the shadow is red. Each of the dots has its own interpolation associated with it. None means you get this hard edge when one color transforms into another. You can see what other interpolation types do, I sometimes use smooth.
You can also drag the circles left and right, to change the overall appearance of the shader (make the spotlight tighter,etc.). You can also introduce new dots (new steps) just by clicking anywhere on the ramp.You can also delete them by clicking on the little squares at the bottom.
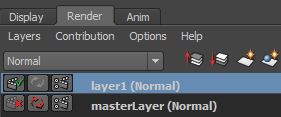
3. Now let’s set up another Render Layer. Go to your channel Box, below you will find 3 tabs, one of which is called Render. In the Render tab you will see 4 icons, click the 4th one,you will create a new empty render layer. Select your objects in the viewport, right click on the newly created layer : add selected objects.
Let’s quickly talk about the icons opposite to layer names. The first one: if it has a green tick, it means this layer will be rendered when you hit your render button. The second one: if it’s green, your renderer will be using the last rendered image. So, if you’ve changed your scene, but still getting the same old render image, don’t freak out, and see if this option is turned on.
If you haven’t rendered anything from that layer yet, it will be greyed out. The last one takes you to your render settings.
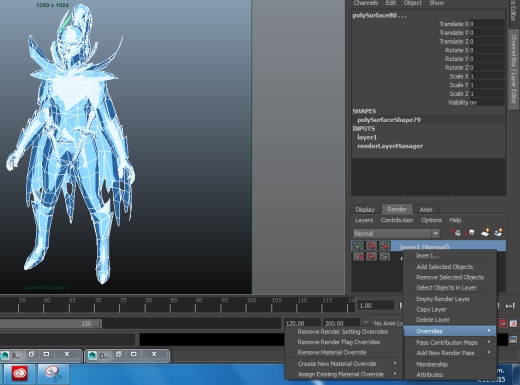
4. You need to assign your object/s to this new layer. select them, right click on the new layer : Add Selected Objects. After that we will need to create a material override. It means that this material will be applied only to this layer, and will not affect your main Master Layer with all your cool shaders that have already been set up.
Do a right click on the layer again: Overrides : Create New Material Override. Assign a new Surface Shader. I usually set its Out Matte Opacity to Black in the Attribute Editor after that.
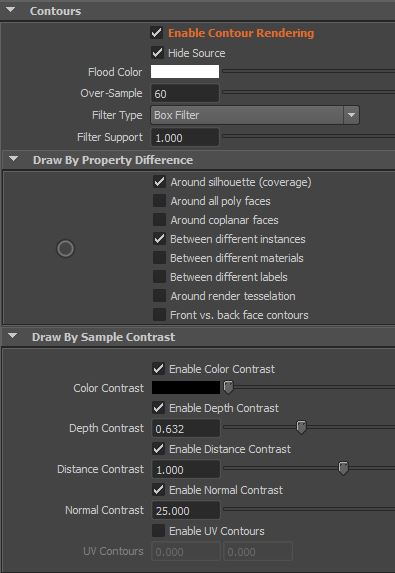
5. Now you want to click on that 3d icon opposite your newly created layer. It will take you to your render settings. Go to Features tab : Contours. Now, the next step is quite important. Before clicking on Enable Contour rendering, right click it. Click on Create Layer Override. Without this setting, contour rendering will be applied to all of your layers, and we might not want that.
Check Enable now. Click Hide source, make Flood Color white.
6. Now we need to enable Contour rendering on our shader. Go Window : Rendering Editors : Hypershade. Find your solid shader in there (the white one). Middle mouse drag it into your Work Area. Look for the icon below Window. It will show the output connections of your shader.

We need to get to surfaceShader1SG. Go to Attribute Editor : Mental ray : Contours : Enable Contour Rendering. You can play with the width settings here.
Now try and render! Oh no, you can’t see anything? Go into your Quality Tab for Render Settings, and change Sampling Mode to Legacy Sampling Mode, make share you create a layer override for this as well, otherwise your Master Layer will get affected, we don’t want that. You should be able to see some positive results after that.
7. To get better looking results, you will most likely have to play around with the Settings like Contour : Width (for surfaceShader1SG), and the settings for your Render. Also, notice you will be getting different results changing the number for Normal Contrast. I have rendered two different outlines with it set to 25 and something close to 60. Another work around would be having a couple of different shaders, that would give you more control over tricky geometry heavy areas of your mesh. You will just need to change your Width settings to smth smaller. Below are my settings for this scene.
8. Combine the toon shader render with the outlines one in the Photoshop. Multiple the outlines on top of the layer with flat colour.
Spending enough time tweaking those settings I’ve mentioned before would give you really cool results. For the purpose of this tutorial, I wasn’t trying to create anything specific, just wanted to show you a way in which it can be done. Also, with this technique, you can render out your wire-frames! Just check Around All Poly Faces in your Render Settings.
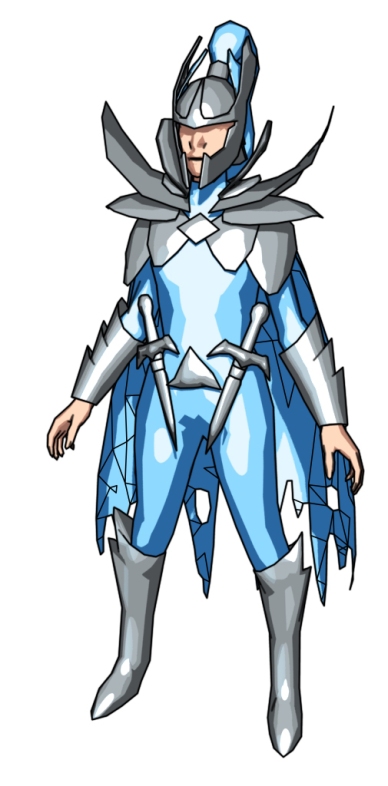
Final result:
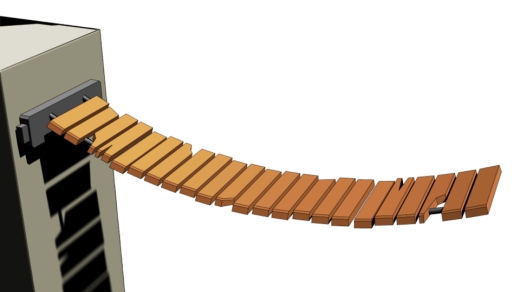
This is another example of the same technique,was a bit easier to set up, and it looks much ‘cleaner’.

